Step-by-step Installation
Table of contents
- Requirements
- Option 1: Installation from precompiled binaries
- Option 2: Conda
- Option 3: Compiling from source
CREST was built as a commandline-based application for UNIX distributions. Therefore, this guide will assume that you are familiar with the basic navigation in the terminal. Installation instructions shown in the following were tested on Ubuntu 20.04 LTS .
Requirements
Requirements for the installation can depend on whether you decide to install CREST from the precompiled binaries, or build the program on yourself locally:
- In general, compiling the program from source will provide you with a binary more tailored to your specific computer/architecture. Furthermore, you will be able to get the newest developments and code updates more quickly. However, building the program from source will require some effort.
- The installation of statically compiled binariesThis means the source code has been translated into ‘machine language’ and should not need any other dependencies at runtime besides the obvious. from GitHub is faster and will in most cases be sufficient. However, in rare cases you might encounter runtime errors. Additionally, the precompiled program is updated only periodically with a new release, so some code updates might not yet be included.
- We also provide a
condainstallation (see Option 2 below), which is probably the most straighforward way of obtaining the program.
Most CREST applications will require access to the xtb program. You will need to install xtb on your machine and make sure it can be executed globally. You can follow the installation instructions for xtb on the GitHub repository , but note that most of the process is similar to the CREST installation presented here. If you plan on using QCG, you can either use the recommended aISS docking algorithm implemented in xtb version 6.6.0 and above or the xtbiff program.
Option 1: Installation from precompiled binaries


The statically linked binaries can be found at the release page of this repository. The most recent program version is automatically build (both Meson/Intel and CMake/GNU) from the main branch and can be found at the continous release page, or directly download them here:
![]()
Downloading the binary from one of those links skips step 1 and 2 in the following.
- Navigate to the Releases tab on CREST’s GitHub page (Note, there is also a continuous release , tied to the two above download links)
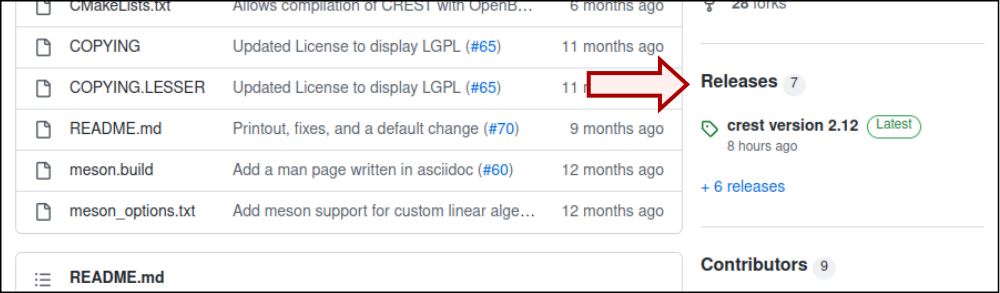
- Select the release version you want to install (probably the one flagged as “Latest”) and download the packed binary

- Move the packed tarball (which includes the binary and license files) to some place of your choice (e.g.,
/home/$USER/bin/) and unpack it there Simply unpack the binary and add it to your PATH variable.tar -xf crest-gnu-12-ubuntu-latest.tar.xzor
tar -xf crest-intel-2023.1.0-ubuntu-latest.tar.xz - Assuming you put CREST in
/home/$USER/bin/, make the statically linked binary an executable (might requiresudo) withchmod +x /home/$USER/bin/crest - Then export it to your
PATHvariable to make it accessible on your system, if necessaryexport PATH=$PATH:/home/$USER/bin/You can check if the export was successful by executing the command
which crestwhich should return the full path to the CREST binary. You can also add the
exportline to your~/.bashrcto load it on the terminal startup.
That’s pretty much all. If xtb has been correctly installed, you can now start to use CREST. You can test the installation, for example by executing
crest --version
which should print the program header to the terminal.
Option 2: Conda


A conda-forge feedstock is maintained at https://github.com/conda-forge/crest-feedstock.
Installing CREST from the conda-forge channel can be done via:
conda install conda-forge::crest
The conda-forge distribution is based on a dynamically linked CMake/GNU build. conda should take care of all the setup and core dependencies, but since it is a dynamically linked build, it can access different linear algebra backends like OpenBLAS or MKL.
export OPENBLAS_NUM_THREADS=1, as there may be an ugly warning in the concurrent (nested) parallel code parts otherwise.You can test the installation, for example by executing
crest --version
which should print the program header to the terminal
Option 3: Compiling from source
If you wish to build the program yourself from the source code, you will first have to obtain it. For this, navigate to CREST’s GitHub page and either fork it (if you are familiar with GitHub), or locate the “Code” button.
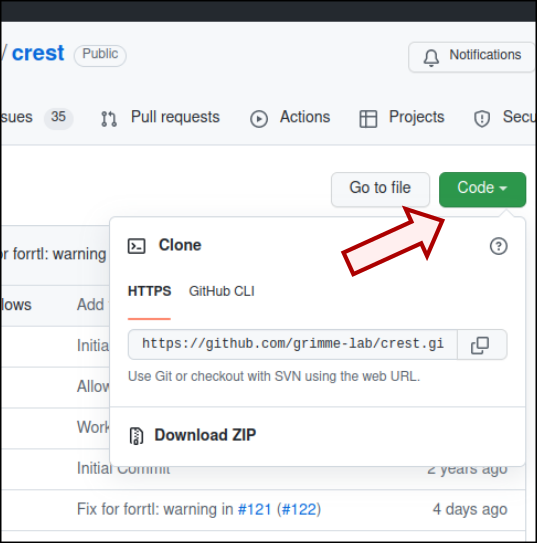
There, you will have the option to either clone the project with git via the command line
git clone https://github.com/crest-lab/crest.git /directory/of/your/choice
If you chose to build the program from source, it is advisable to download any motential subprojects that will be build into CREST. To do so, go to the project directory that you just have set up, and execute
git submodule init
git submodule update
which should check out all the subprojects. To update the submodule sources from the respective remote branches
git submodule update --remote
can be used.
After you have obtained the source code, you will need to build the program. Instructions on this can be found on the next page.
Continue: Compiling from Source